

Hooray, OMG, wow, this collection has come around fast. SUMMER 2017 – those words excite me sitting here on a dark winter’s morning. Just having these colours sitting by me at my desk the last few days has brightened my mood and put me in a mischievous notion. We have some hot corals and reds, and two, YES TWO, greens… but excitement of all excitement… a proper glittery teal that is pretty much opaque in one layer and solid as a rock in two.. I can’t even believe it!
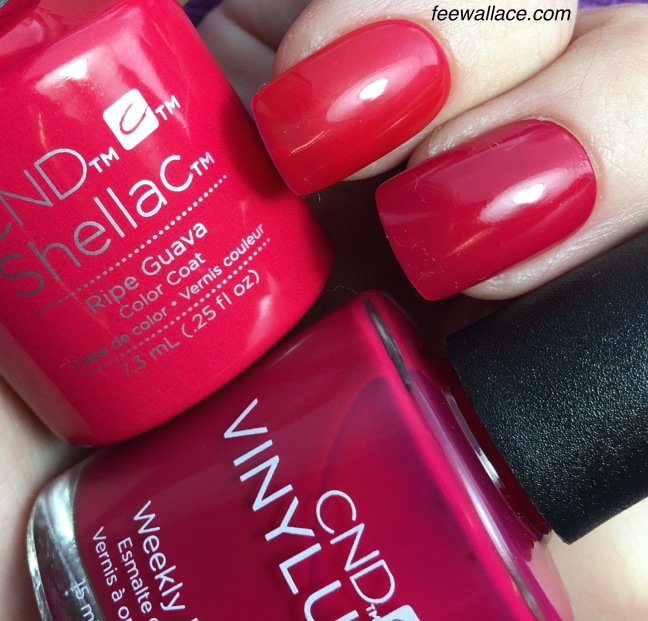
Ripe Guava
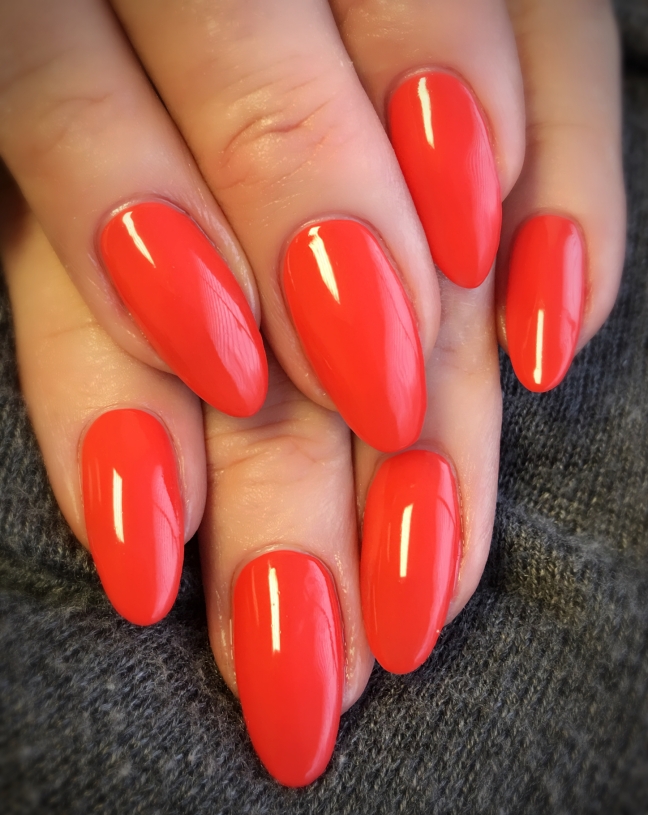
We’ll start with a sure fire hot hit. This colour comes in both SHELLAC™ & VINYLUX™ and both are luscious. I’d say the Vinylux incarnation is slightly cooler in tone and a little more opaque, but only half my panel of experts agreed with me on that. Ripe Guava is the perfect name for this colour, I’m kinda salivating just thinking of it. It looks like a liquid, like I made a ‘New Year/New Me’ smoothie with the flesh of two guavas, half a small watermelon, and BEETROOT, it looks delicious!
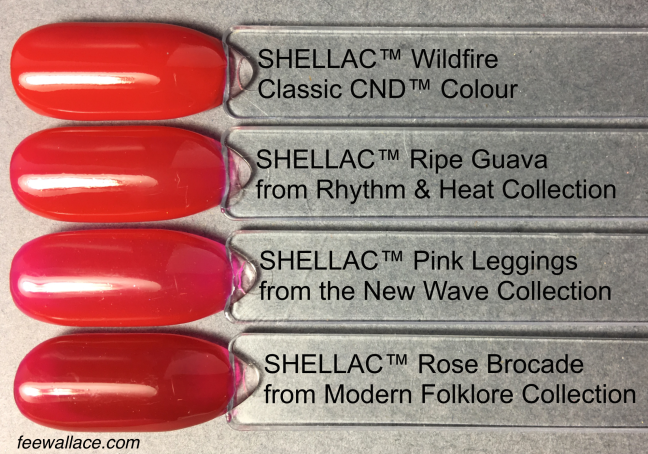
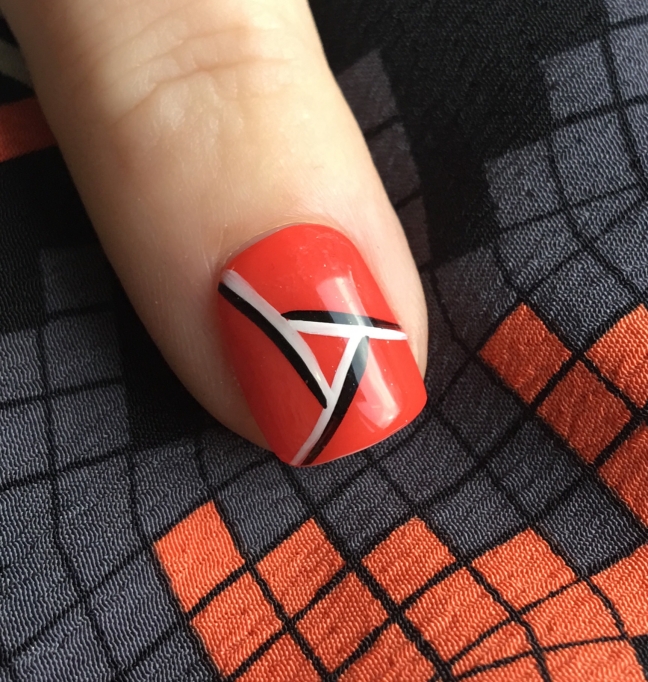
Somewhere between the redness of Wildfire but with the awesome gloss qualities of Pink Leggings, lies Ripe Guava, and my goodness is it perfect for a foil sandwich. I find reds the hardest to photograph of all colours in terms of getting them to look true in the picture. I know the lighting in the above pic looks a little funky… but that’s how, 57 pictures later, I got the most true to life colour representation.
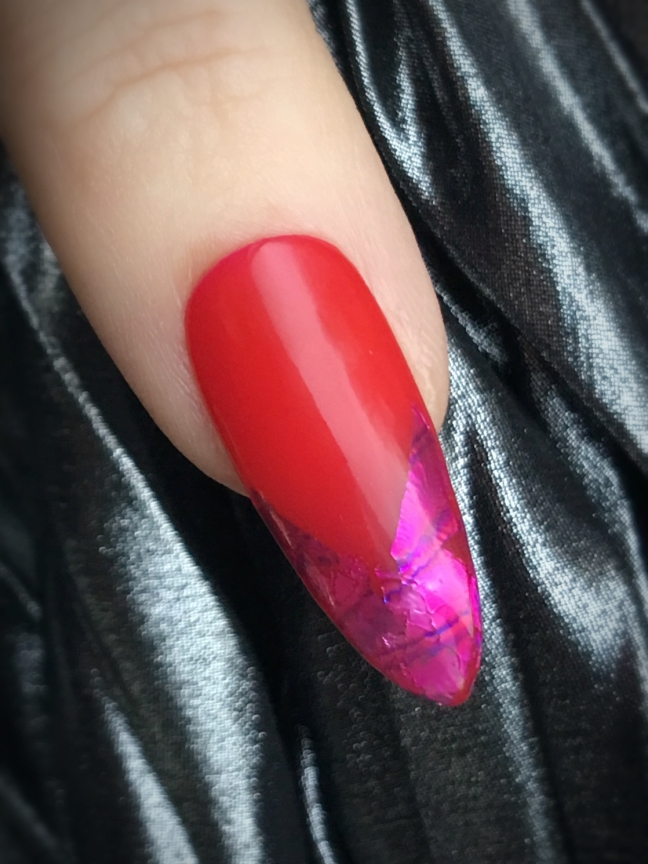
This obscenely long foil sandwich french looks like it like belongs to someone who might well kill you on sight, or at least eat you alive. I applied and cured two layers of Shellac Ripe Guava, then applied Lecenté Oil Slick Foil to the tip of the nail creating an extreme v-shape smile line. I topped this off with a further extra extra thin layer of Ripe Guava before finishing with Shellac™ Duraforce Top Coat.
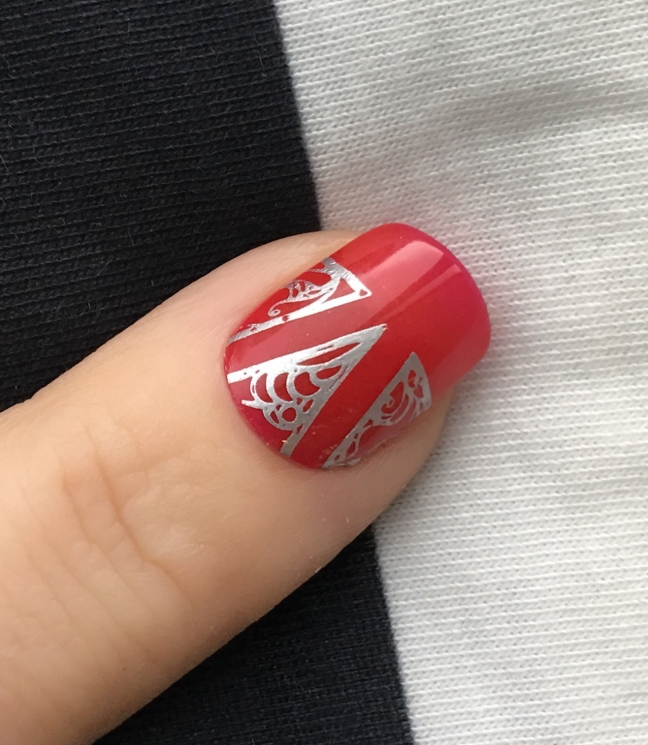
This next design is simply two cured layers of Shellac Ripe Guava and I have stamped directly onto the sticky top film of the cured Shellac colour layer using CND™ Creative Play in Polish My Act, using the :YOURS Loves Fee Falling Floral Stamping Plate. This is a cute one, I love it.
If you are new to stamping or looking to trouble shoot some challenges check out my previous blog Nail Art Stamping – Rules to Live By! Step by Steps & Troubleshooting. In that blog I detail the step by steps for the 4 methods of stamping we love to use with CND™ products to ensure success.
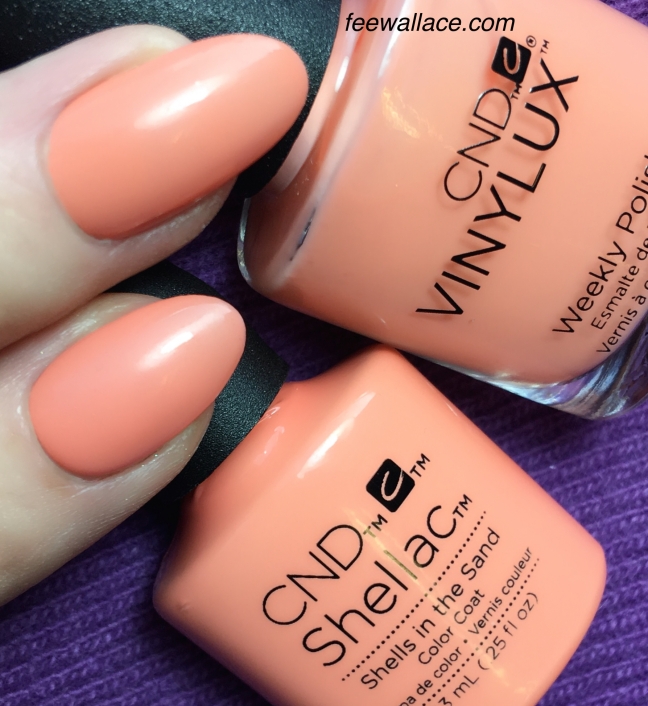
Shells in the Sand
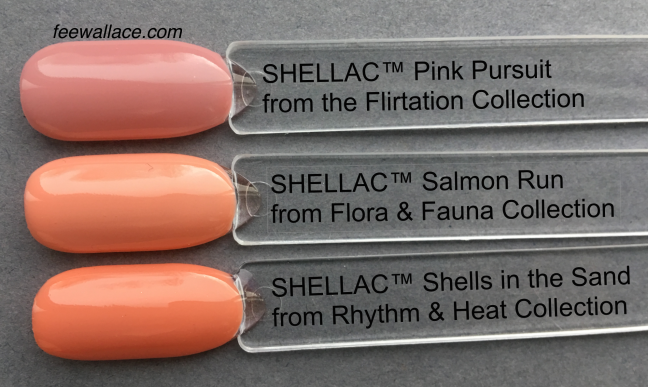
This is another banging summer colour. Somewhere between Salmon Run and the warm of Pink Pursuit, but oh so much richer than either. We just know this is going to be wildly popular. This type of colour in lipstick is something I’ve seen the woman in my life become very addicted to recently, and according to all sources it’s going to be everywhere this summer. Whether your client’s style is soft and romantic or bold extravagant, Shells in the Sand is ticking all those boxes.
By the time this collection launches, Valentine’s Day will be over, clients will be returning for an Enhancement Rebalance or a Re’Shellac looking for an antidote to those pink glittery love-heart things they loved at the time and are now bored to tears with.
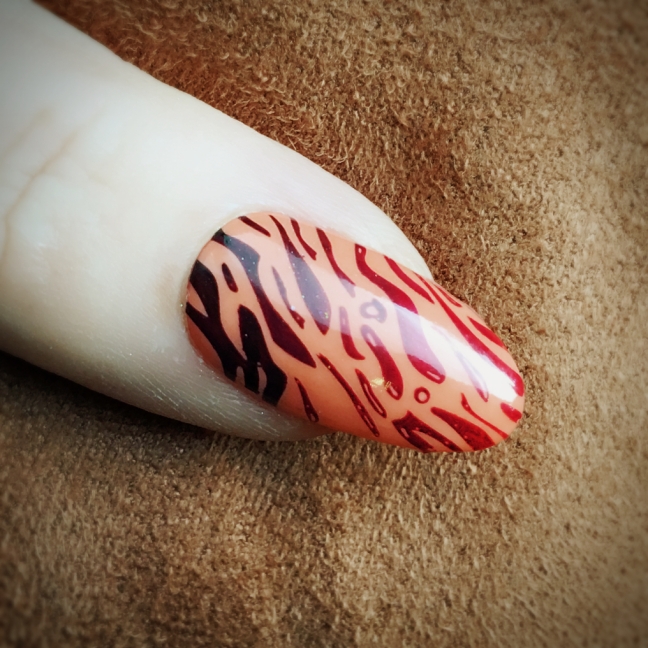
This again is simple stamping with Creative Play over Shellac. I used the :YOURS loves Sascha stamping plate Wild Skin. On the stamping plate I blended 3 Creative Play Colours together to create the colour fade; Black + Forth, Berry Busy and Hottie Tomattie. If you have never tried it before, you will find blending colours on the stamping plate surprisingly easy! I know I did. After a lot of requests, I made a quick YouTube tutorial for this technique showing the steps, you can check it out HERE.
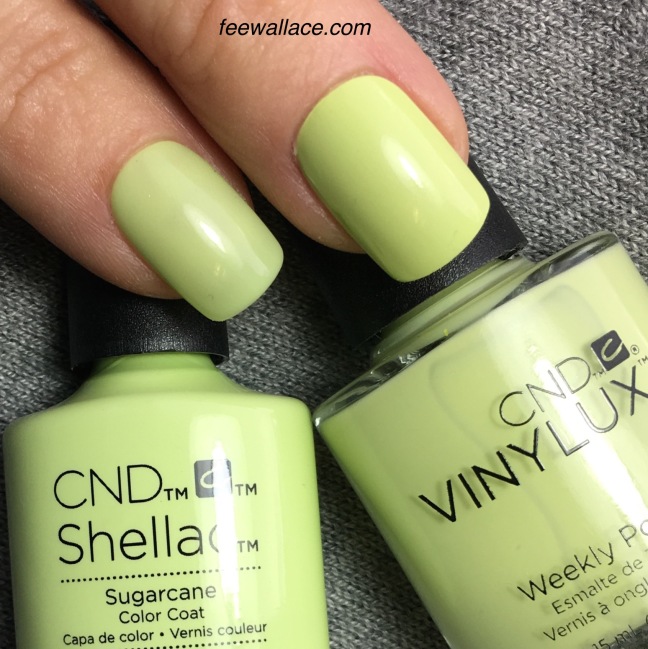
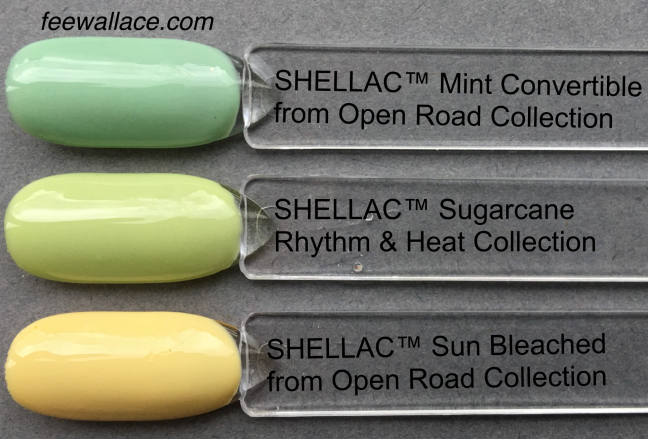
Sugarcane
I realise I am being very biased here, this really is my new favourite nail colour of all time. I’m knocked for 6! Thing is though, green IS NOT for everyone, and we should by no means fill our stock cupboards with things we like when what should be motivating our professional buying patterns is what our clients love and need. But I would argue that even if you don’t like this colour yourself, you’re client base may well need it. As a base for ALL the Lecenté Stardusts, the Lecenté Glimentés, and indeed as a base for layering. Sugarcane gives you a cool, bright, chalky base without any blue or purple in it whatsoever, which if you’ve been studying your colour wheel, is obviously something pretty fundamental we have been missing from the range. But aside from all that ‘colours are actually maths’ chat, for the Lecenté neons ALONE, You just can’t be without this colour – not too green, not too yellow, just enough white.
The first time I saw this colour I thought, ‘this is the green version of Naked Naiveté’, so that means I absolutly must cover it in Lecenté Rainbow Chrome Powder. In this next pic I’ve created a Rainbow Chrome fade in from the sidewall after first stamping with Creative Play over Lecenté Layer It.
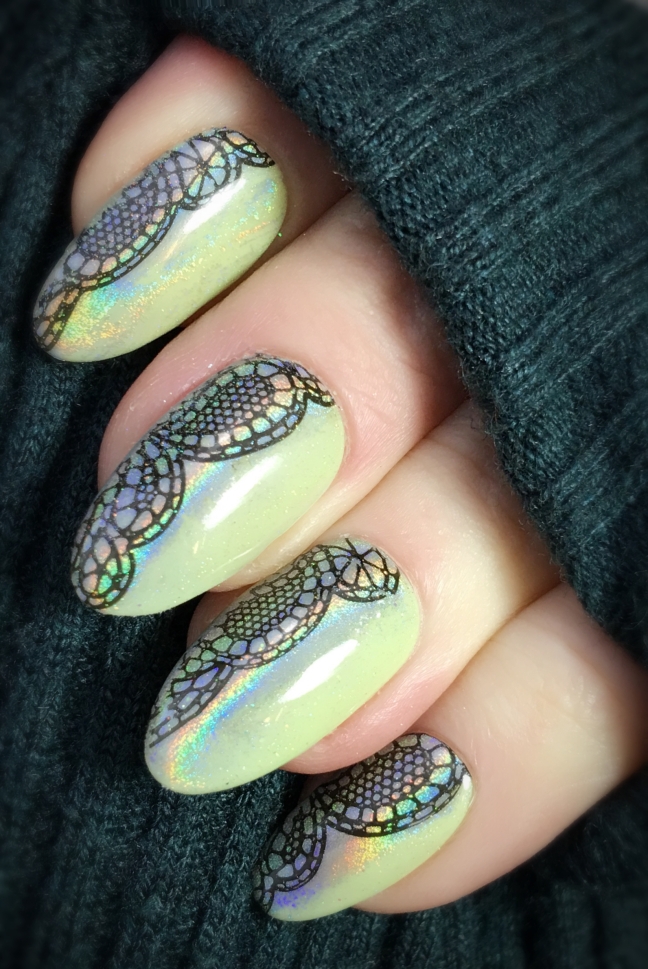
For a step by step for this technique, check out this YouTube tutorial. It’s a different look but exactly the same steps were used.
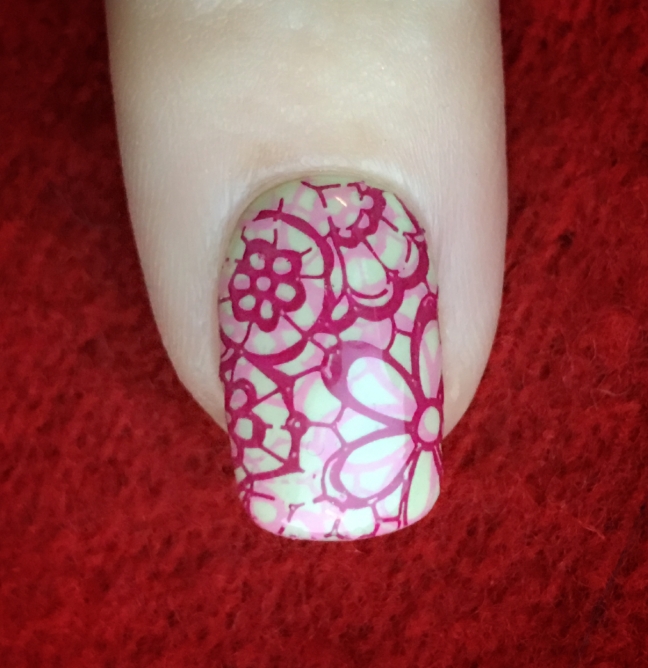
Sugarcane is also ideal as a base for super cute pastel designs. I’m desperate to get a Hello Kitty hand painted on there. For this nail below we began with two cured layers of Shellac Sugarcane and then double stamped. I used the Yours Loves Fee Vintage Lace Stamping Plate. The first stamp was done with Creative Play OH! FLAMINGO and then the second with Creative Play BERRY BUSY, and finished with Shellac XPRESS5™ Top Coat.
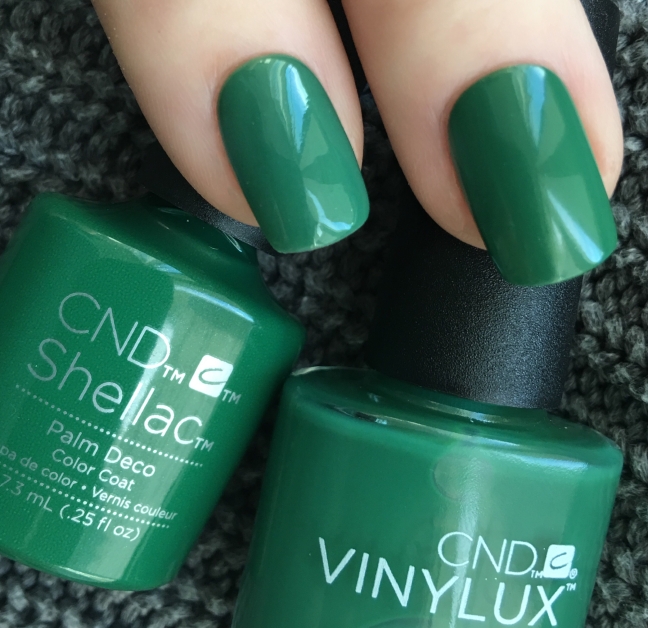
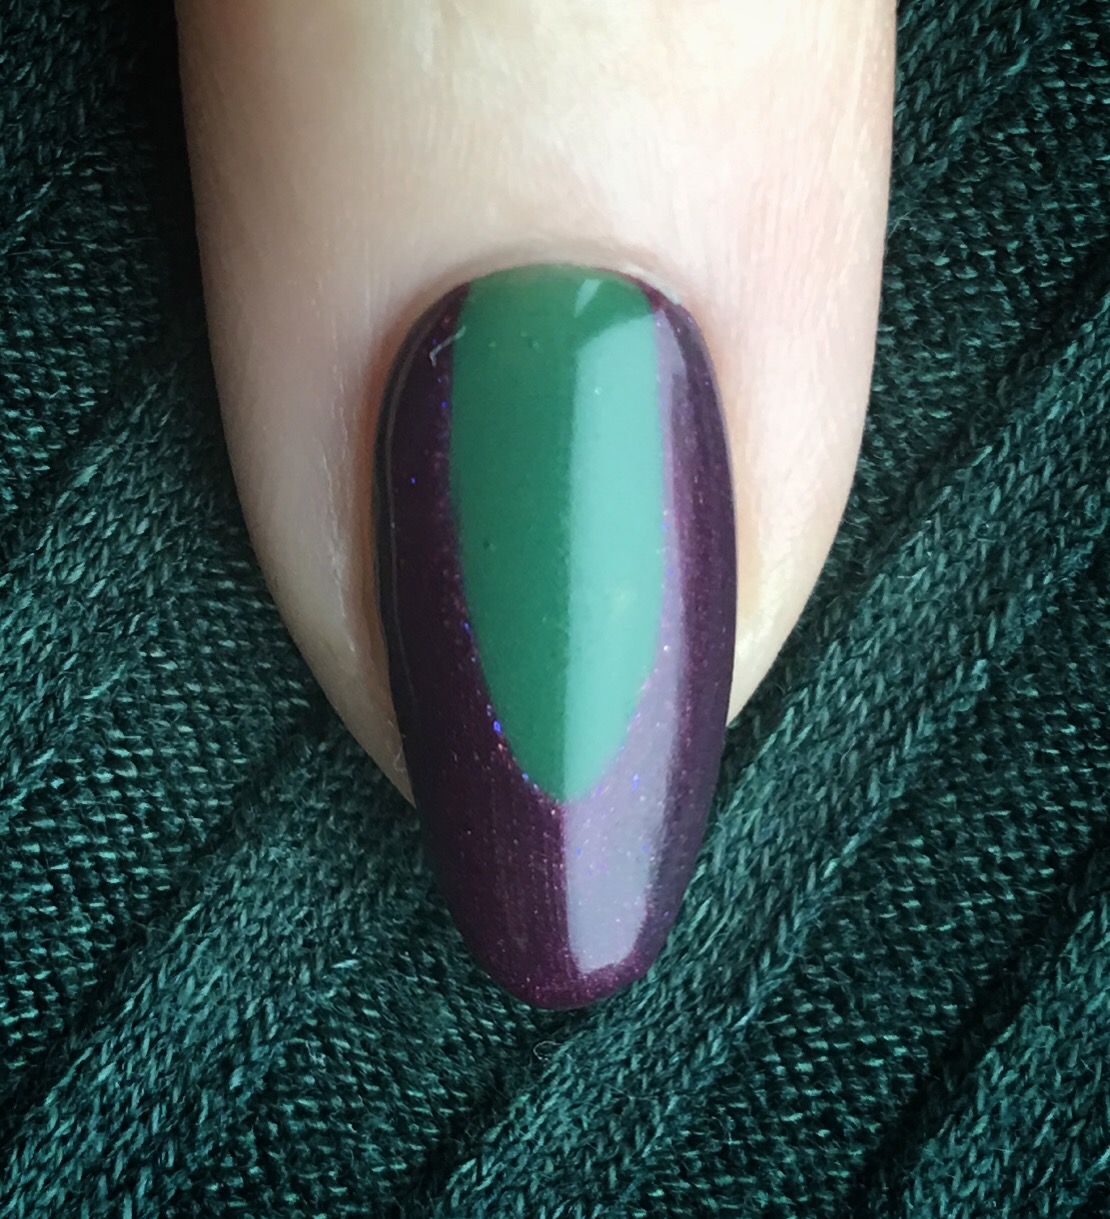
Palm Deco
My word this colour is proving divisive! Some love it, some hate it, some thought it was going to be something different from what it actually is. I mean, it is green, so it’s never going to be for everyone. But again, I come back to the fact that if you offer premium priced, customised services and like to make a point of custom creating colours and being able to match ANY colour your client’s heart desires, then Palm Deco cuts out a couple of steps when it comes to certain layering combinations, it’s really quite different to any green we’ve had in the range until now.
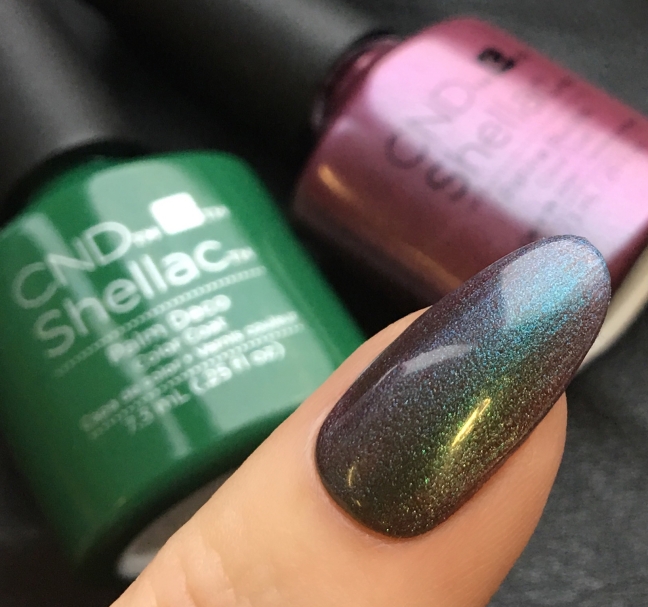
While experimenting with different combinations I’ve come across a layering combo I love so much I almost wept; two cured layers of Shellac Palm Deco with one thin layer of Patina Buckle.
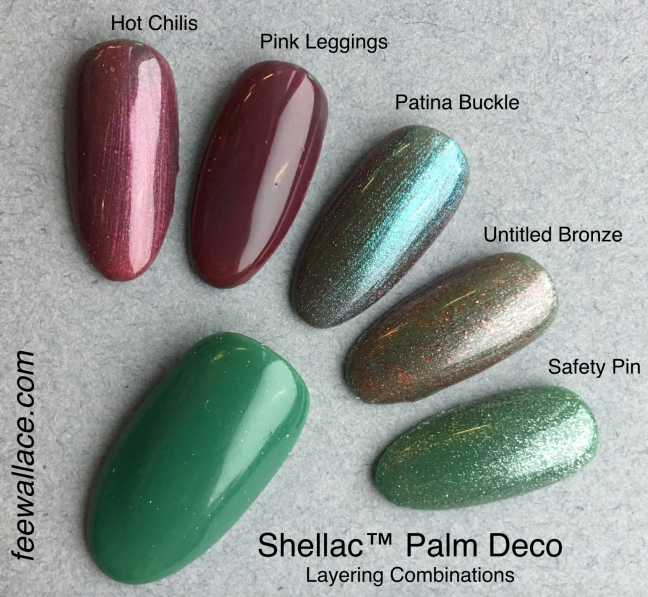
Here are a few other layering combos I’m loving. I’m now feeling inspired to layer Pink Leggings over every other colour in the range! Ha!
This simple design was created by layering Tango Passion over Palm Deco and carving out a section with a gel brush moistened with d.sperse (IPA).
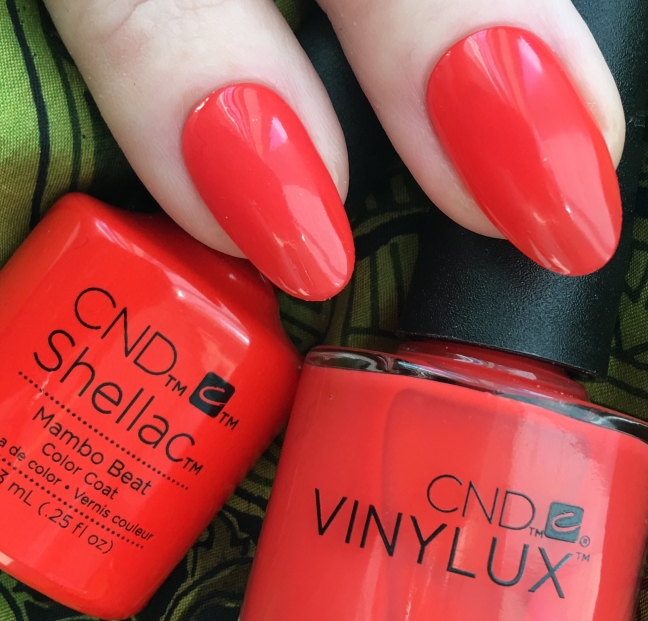
Mambo Beat
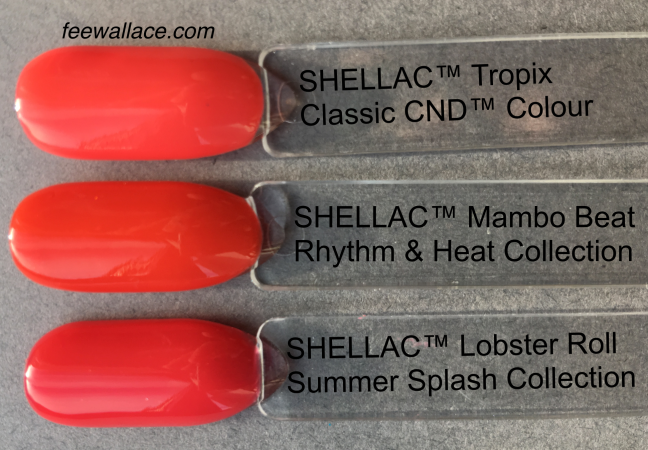
This is one hot colour! If nail colours had a sound, this would have it’s volume up full. Extremely bright and vivid, no shimmer whatsoever, and totally opaque, Mambo Beat is going to be one of the hit colours of this collection all over the world. It’s a real ‘summer holiday colour’ in every sense. More orange and a little lighter than Lobster Roll, but darker and more vibrant than Tropix, this colour really POPS.
Mambo Beat is one of those classic brights that shy and retiring clients surprise you by asking for out of the blue. “Yes, well you know how I’ve worn Rose Bud every day of my life for 7 years, well today I think I might just go wild and have something different!” Mambo Beat is the kind of colour to coax that latent desire for radical change out of a person who has been erring on the side of caution their entire life. Just wait and see, one day it’s choosing Mambo Beat, the next it’s a short haircut, trip to the Bahamas and a new man. I’ve seen this happen on more than one occasion, this is the kind of colour that would be part of that life story.
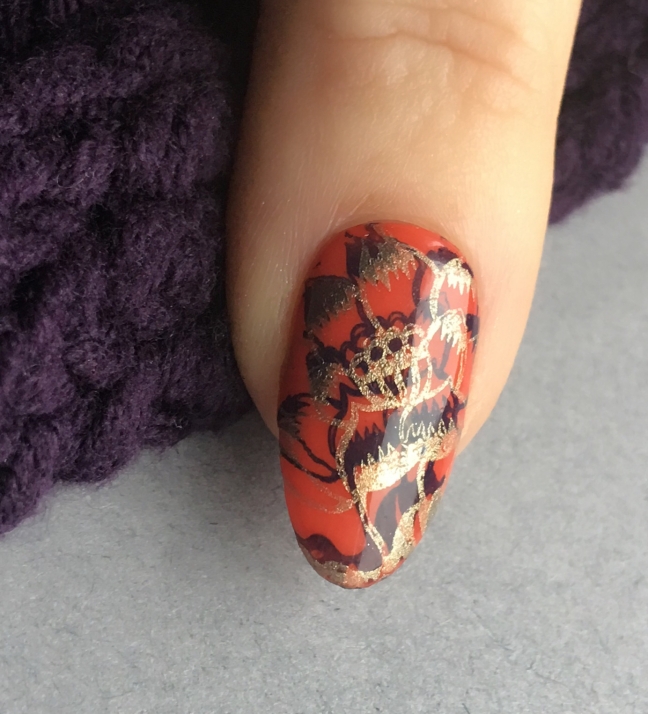
The nail above is created with simple double stamping. First I stamped onto the sticky top film of the cured Shellac Colour layer with Creative Play Navy Brat, then a second time with Creative Play Let’s Go Antiquing, then finished with XPRESS5™ Top Coat. I adore this stamping plate for hot summer prints, I think it’s going to be invaluable all vacation season, it’s the Yours Loves Anna Lee plate Orient Blossoms.
This design was very simply hand painted using the the Lecenté S1 Brush.
We all adored this shot above. It’s one of my regular Liquid & Powder Enhancement clients, she fell in love with Mambo Beat right away, and it’s just perfect for her.
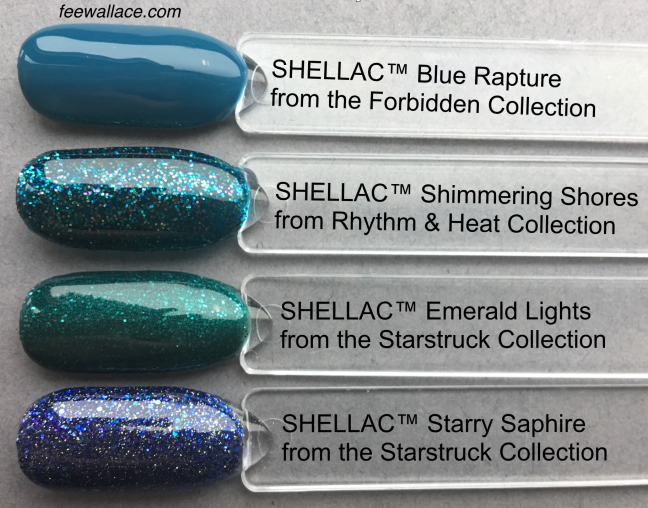
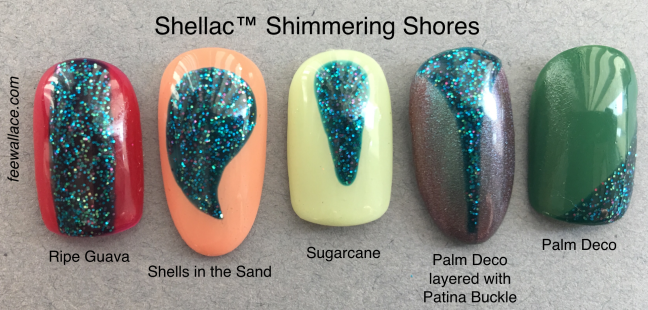
Shimmering Shores
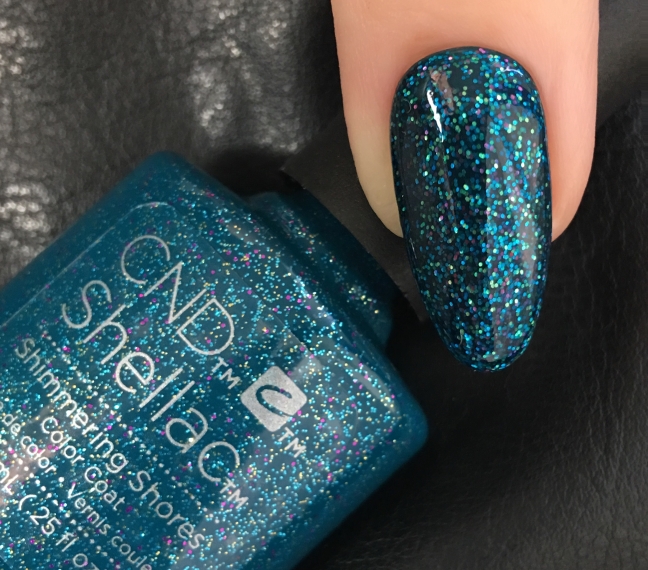
This super glittery Shellac™ exclusive is an absolute BEAUTY! The glitter is extremely dense but lays flat and smooth on the nail without any chubby-ness or sticky-up bits. There are pink, gold, teal and silver glitter particles all suspended in a dark teal gloss. It’s sumptuous!
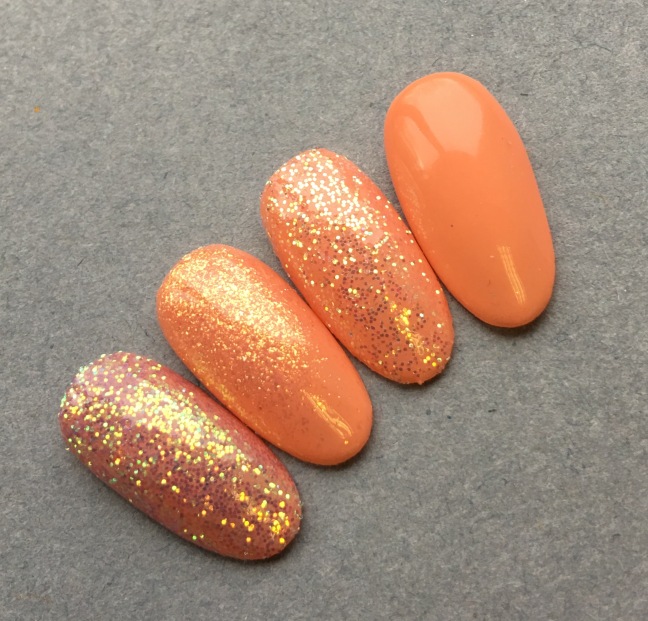
Shimmering Shores is ideal for adding a little fast embellishment. Each of these design in the picture below was created using one layer of Shimmering Shores with the brush right out of the bottle. On a couple of them I cleaned up an edge here and there with a CND™ Gel Oval Brush moistened with d.sperse (IPA).
So although Shimmering Shores is a really cool colour to use for a little bit of nail art, you just can not argue with it as a straightforward colour. This is right up there as one of my all time favourites! Pictured below over CND™ Liquid & Powder Enhancements; two layers of Simmering Shores, one of Shellac ™ Duraforce Top Coat.
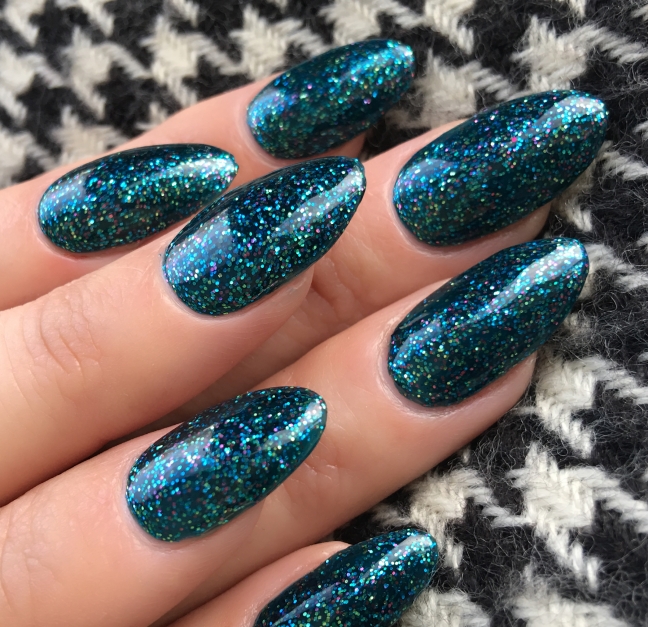
‘Why use Duraforce Top Coat over Enhancements?’, one might well ask. Well, I tried it out on a couple of my clients who have their enhancements coated with Shellac and the feedback was excellent. The clients felt their nails stayed in perfect shape for longer. These were both clients who usually go 4 weeks between Nail Enhancement Maintenance appointments, which is too long really… but schedules don’t allow for a more timely appointment. I’m very pleased with the results of Duraforce Top Coat in general! But XPRESS5™ still gets the top spot for me when it comes to Shellac™ on natural nails, 5 minute removal with no nail damage, buffing or filing, is just the best thing ever.
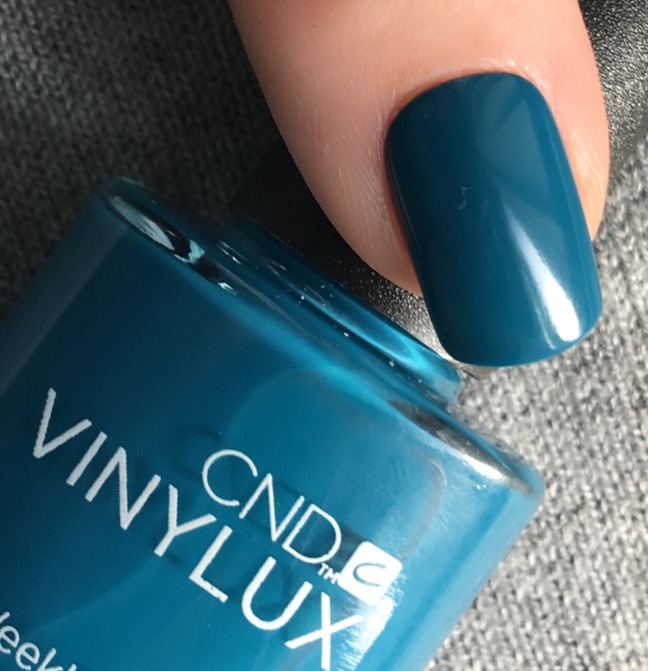
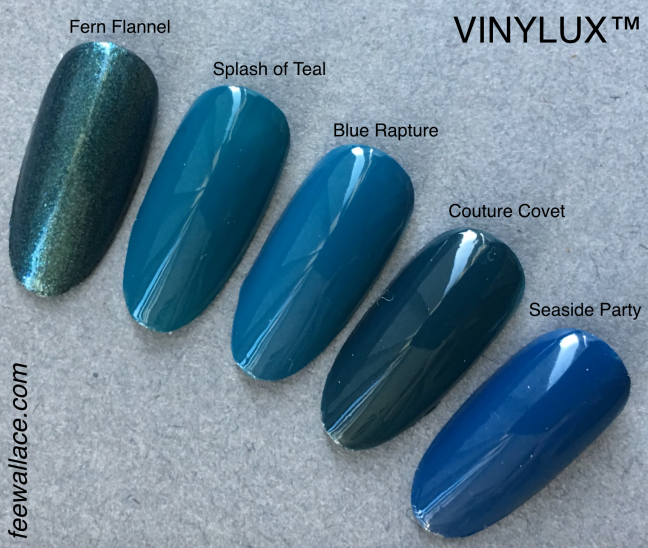
Splash of Teal
This colour is a Vinylux™ exclusive. It’s rich and velvety and goes with my hair. It’s safe to say I love it. While there are already Vinylux colours not a million miles away from this shade, we’ve not had something with quite this balance of blue, green and grey.
I decided to use Splash of Teal as my main colour for some long over due hand painting practice/self indulgence. Trying to push your skills further than you believe them to comfortable go is a must, even if you only do it every so often.
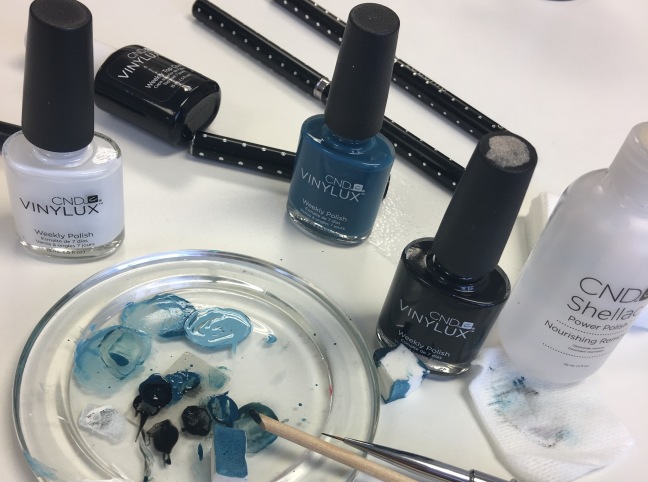
The goal I set myself was to create a hand-painted portrait using only Splash of Teal Vinylux with Black Pool and Cream Puff to mix it with for different shades, tints and tones. I used sponges and the two of my favourite brushes from Lecenté, the Lecenté D3 Brush and the Lecenté S1 Brush. This was the final result…
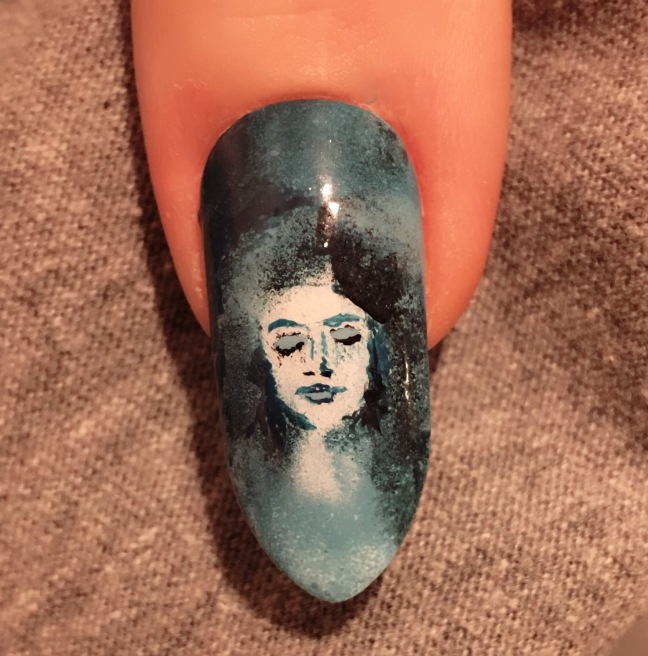
While this kind of nail art is not exactly commercially viable (it takes too long to do and can’t be seen properly without readying glasses), it is a great exercise in pushing your skills and comfort zone, usually showing you abilities you never knew you had and giving you ideas you would never have thought of otherwise.
Thanks so much for checking out the blog! I hope you have found something useful in here and that I’ve been able to share my excitement for the CND™ Rhythm & Heat Collection. The collection launches in the UK & ROI on the Saturday the 25th of February and is available exclusively from Sweet Squared.
My next blog is going to be all about the new products about to be added to the Lecenté Chrome Collection. I’m quivering with excitement!
To keep up to date with new colours, images and nail art techniques from me, give me a follow over on:
Instagram, Facebook, my YouTube Channel for tutorial videos for Nail Professionals, Twitter, and SoundCloud for audio recordings of some blog posts and articles.
Till next time!!
Fee xxx

Fee, I just recently discovered you and you’ve instantly became my Shellac Shero. Currently I’m thinking of becoming a p/t professional nail tech when I retire (coming soon, I think) and you and some of the other wonderful CND Education Ambassadors are so inspiring and make me proud to be a “wannabe” — at least until I can beome the real thing. 🙂 Thank you so much for this great review AND the stupendous nail art tips!
LikeLike
Thank you Michelle, thanks for your kind words ☺️ Good luck in your retirement and new ventures in the nail industry! Xxx
LikeLike
Hi Fee
Completely off the subject of this thread but I’m in a pickle.
What base colour do you recommend to get Rose gold chrome?
LikeLike
Kirsty, have a look at this: https://instagram.com/p/BM0i0zEjwWT/
Xx
LikeLike
You rock!!! xx
LikeLike
I adore Ripe Guava! My nails look perfect! I don’t even add any details, glitters, rhinestones…
LikeLike