

Thank you to everyone who tuned in for Lecenté Facebook LIVE! This blog is packed with all the links, references, recipes and step by steps mentioned in the broadcast.
If you didn’t catch the live broadcast you can check it out here!
Where to buy?
All products used in this broadcast can be purchased in the UK & Ireland, exclusively from Sweet Squared. Sweet Squared provide product and education to Nail & Beauty Professionals, as well as education for complete beginners. If you don’t have an account, the easiest way to set up an account is over the phone.
UK: 0333 000 7000
Ireland: 01 408 9191
From anywhere else in the world, check out each brand’s list of international distributors to find your most local supplier.
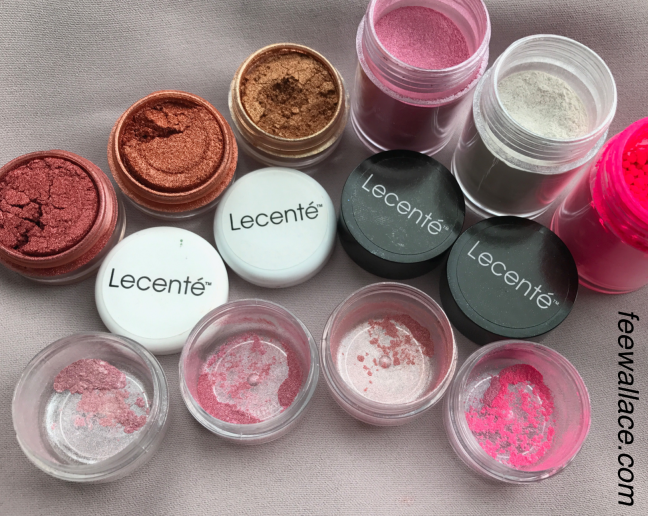
Lecenté – for glitters, powders, foils, neons, art brushes, chromes and Layer It.
CND™ – for CND Shellac, Vinylux, Creative Play, Retention+ Liquid & Powder and Brisa Gel Nail Enhancement Systems.
:YOURS – for nail art stamping supplies. Stamping Plates & the Halo Stamper.
Where to learn?
Award winning education for nail professionals at all levels from beginner to advanced available in the UK & Ireland from Sweet Squared. Check out info for all courses including dates and prices here: My Sweet Squared.
QUICK EDUCATION LINKS!
CND™ Liquid & Powder Beginners or CND™ Liquid & Powder Conversion
CND™ Shellac Beginners or CND™ Shellac Conversion
The Lecenté Look Class – Lecenté products, Lecenté techniques, Lecenté kit
Put :YOURStamp on it – stamping nail art workshop
Perfect French with CND™ L&P – Babyboomer/French Ombré, classic french and reverse french enhancements.
French Ombré / Babyboomer Nails – Enhancements
I shared one of my favourite blends for custom colour enhancement products in the live broadcast. Here is the recipes and ratios for each of the blends. It’s easy to customise the look of your sculpting powder provided you follow the rules…
Remember – the max ratio for creating custom blended powders as part of the CND™ System is NO MORE THAN 3 parts Additive to 7 parts Sculpting Powder.
In other words, at least 70% of what’s in that pot needs to be actual sculpting powder or you and your client are gonna have problems.
Fee’s Soft Glitter White Sculpting Powder Blend
5 parts CND™ Perfect Color Clear Powder
3 parts CND™ Perfect Color Soft White Powder
1/2 a part Lecenté White Ombré Powder
1 part Lecenté Golden White Iridescent Glitter
1/2 a part Lecenté Snow White Ultra Fine Glitter
Fee’s Soft Glitter Pink Sculpting Powder Blend
3 parts CND™ Perfect Color Warm Pink Opaque Powder
5 parts CND™ Perfect Colour Clear Powder
A pinch Lecenté Pink Ombré Powder
1 part Lecenté Golden White Iridescent Glitter
Perfect Simple Ombré with CND™ Shellac™
If you checked out the video you will already know that my preferred way to create an ombré colour fade as part of a Shellac service is with pigment powder onto the top film of the cured Shellac colour layer. I have found this method gives me better, more consistent high quality results quickly and reliably, than say, blending two Shellac colours together on the nail with a brush. Now there are many who like this method and that’s totally cool! You can find a bunch of YouTube tutorials showing how that can be done. At this moment in time, for me, I’d rather know my Shellac is cured in one even thin layer as it was designed to be for best results, so for now I choose not to blend uncured colours together on the nail.
First is a step by step with colour, then a step by step for a French Ombré as part of a Shellac service.
Simple 2 Colour Ombré with CND™ Shellac
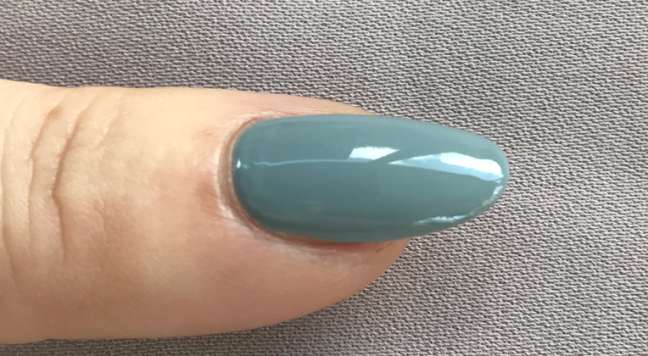
Step 1
Start with a cured layer of Shellac colour. In the picture I’ve used Shellac Mystic Slate from the CND™ Glacial Illusion Collection over a Liquid & Powder Nail Enhancement.
Step 2
Take a small amount of pigment powder on a dry brush. Here I am using Lecenté Orbit Stardust and a dry, roughed up CND™ Oval Gel Brush. A dry Lecenté G1 Brush works great too!
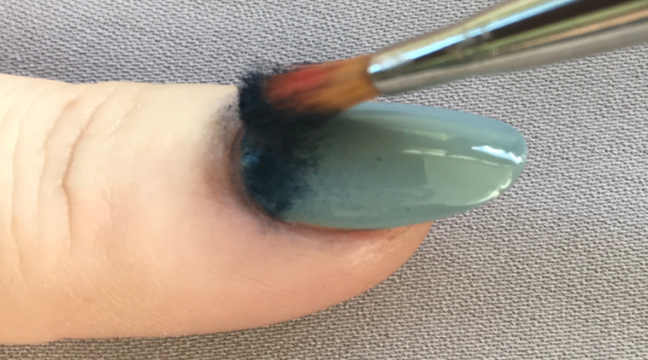
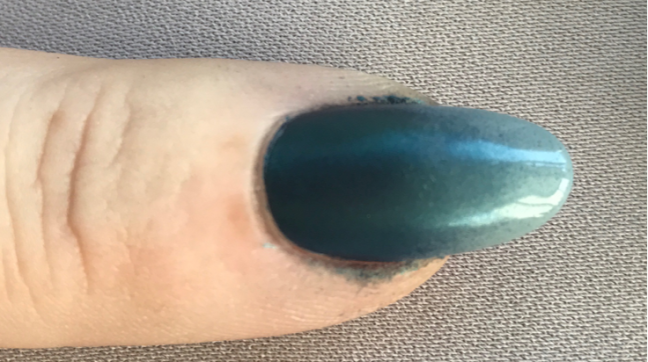
Step 3
Press the powder onto the top film of the cured Shellac colour layer using a light pressing/patting motion (NOT brushing). Cover the desired area of nail in this way – about half way for a standard 50/50 ombré.
Step 4
Clean of any powder left on the brush on a dry fabric towel, and ‘blow’ away any excess powder left on the nail with a tool such as an eyelash puffer. Tip: It would be unprofessional and unhygienic to blow on your client’s nails with your mouth! And with practice you won’t be getting excess volumes of powder anyway.
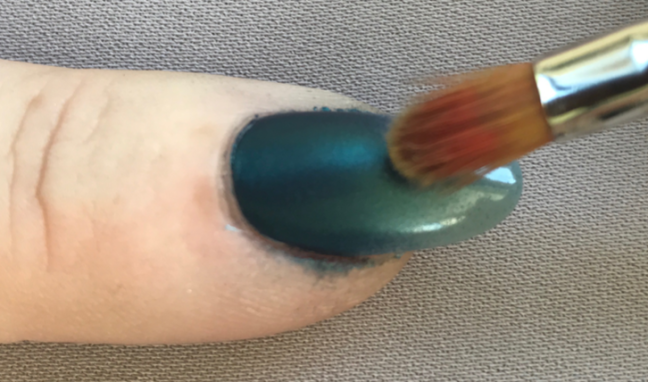
Step 5
With your cleaned brush, gently blend the colour to the nail with a very gentle ‘flicking’ motion with the very tip of your dry brush. Clean the brush again on a dry towel after a few strokes and blend till you are happy with the fade.
Step 6 – optional
If necessery, pick up another very small amount of powder on your brush and apply once more along the cuticle line of the nail to darken/intensify the colour at the base of the nail. Tip: Again, use the puffer to ‘blow’ off any excess powder after this step.
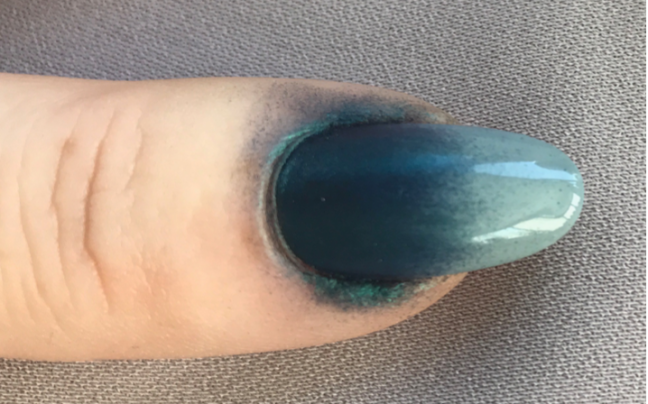
Step 7
Finish with the Shellac Top Coat best suited to the needs of your client. Try experimenting with the Shellac Top Coat Trilogy, Matte, Pearl and Glitter for some beautiful effects over your ombré. In the picture below I’ve used Original Shellac Top Coat.

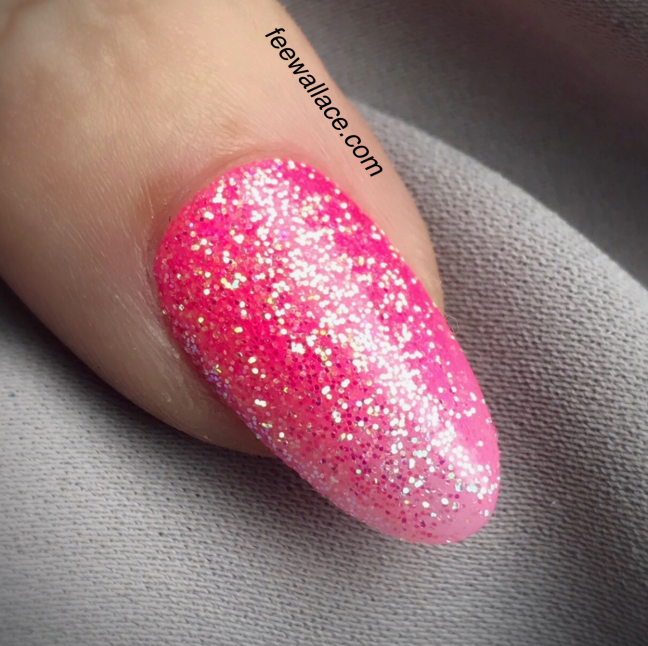
Tip: If you want to add a more intense glitter effect, before applying Top coat, apply a layer of Shellac Clearly Pink to your finished ombré, cure and add an Iridescent Lecenté Glitter such as Golden White Iridescent, Capri Iridescent, or Girlfriend Pink Iridescent. All Lecenté Iridescent Glitters show the colour through from underneath so look amazing over an ombré! Finish your glitter layer with Original Shellac Top Coat.
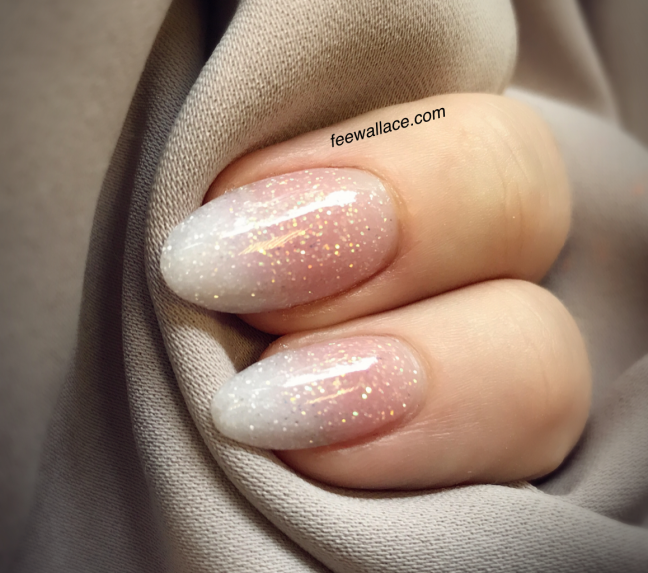
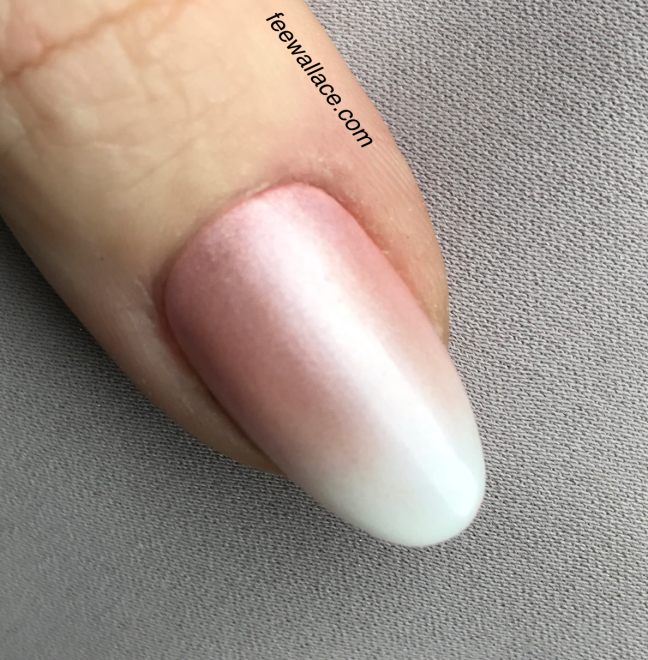
French Ombré ‘Babyboomer’ with CND™ Shellac
Method by Fee Wallace combining Lecenté products with CND™ Shellac
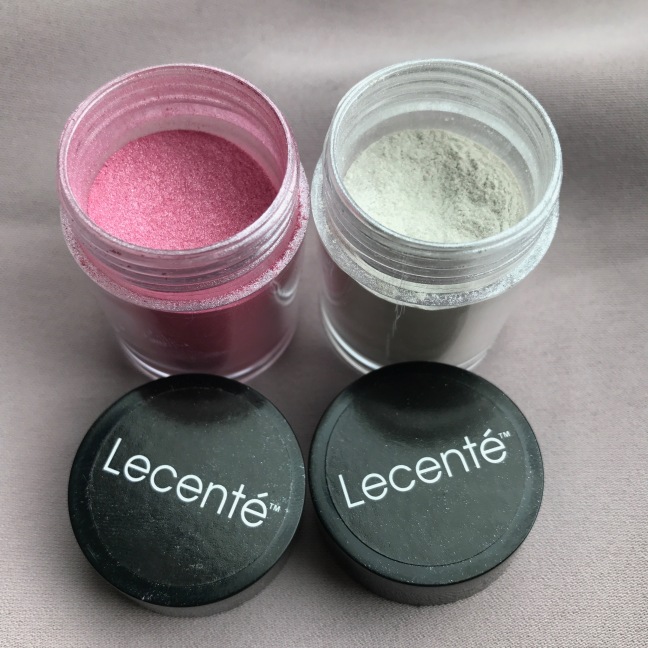
Step 1 – choose/create your powder
Use a powder straight from the pot or create your own customised blend to suit the needs of your client. My all time favourite blend consists of equal parts (a brush-full) of Lecenté Pink Ombré Powder and Lecenté Bronze Chrome Powder, with just a pinch of Lecenté White Ombré Powder. Smash them up together with a dry gel brush or Lecenté G1 in a little pot and we’re ready to go!
Tip: Experiment with different blends. Lecenté Rose Gold Chrome and Lecenté Copper Chrome also look beautiful in place of the Bronze Chrome in the recipe above. Try adding Lecenté Neon Pink ‘Snakebite’ Powder for a vibrant in-your-face French Ombre!
Step 2
After performing CND PEP followed by the application and cure of Shellac Base Coat, or appropriately preparing the nail enhancement surface, apply and cure two layers of Shellac Studio White.
Step 3
Take a small amount of pigment powder on a dry brush. Press the powder onto the top film of the cured Shellac colour layer using a light pressing/patting motion (NOT brushing). Cover the desired area of nail in this way – about half way for a standard 50/50 ombré , or two thirds for a more authentic natural french manicure style.
Step 4
Clean of any powder left on the brush on a dry fabric towel, and ‘blow’ away any excess powder left on the nail with a tool such as an eyelash puffer. Tip: It would be unprofessional and unhygienic to blow on your client’s nails with your mouth! And with practice you won’t be getting excess volumes of powder anyway.
Step 5
With your cleaned brush, gently blend the colour to the nail with a very gentle ‘flicking’ motion with the very tip of your dry brush. Clean the brush again on a dry towel after a few strokes and blend till you are happy with the fade.
Step 6 – optional
If necessery, pick up another very small amount of powder on your brush and apply once more along the cuticle line of the nail to darken/intensify the colour at the base of the nail. Tip: Try using a darker or warmer blend for this step to intensify the appearance of the colour transition in your French Ombré.
Step 7
Finish with the Shellac Top Coat best suited to the needs of your client. Try experimenting with the Shellac Top Coat Trilogy, Matte, Pearl and Glitter for some beautiful effects over your ombré.
Tip: I find that Shellac Matte Top Coat creates the MOST beautiful results for a French Ombré achieved in the way described here. The Matte Top Coat has the effect of softening the pearlescent sheen of the powders. And if you want to soften that sheen but still have a gloss finish in the end, that’s easy too – apply and cure a super thin layer of Shellac Matte Top Coat followed by a super thin layer of Shellac XPRESS5 Top Coat. We get the the best of both worlds – ‘matte but shiny’. (expect removal time to equal that of a shellac manicure finished with Duraforce Top Coat).
Thank you for checking out the blog! I will be updating with more step by steps and more info soon!!
Love, Fee xxxxx

Can’t believe I’ve only just watched this. Is the “new” Lecente brush out now? I own all the current ones and wonder if it’s the P1 or is this a new brush again coming out that you refer to? Gorgeous as ever Fee. xx
LikeLike