
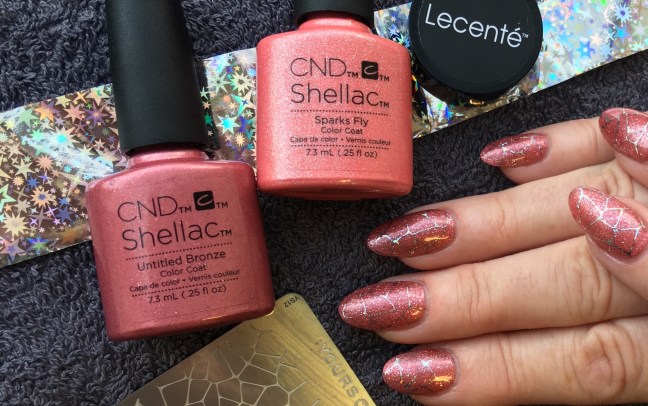

I created this look for one of my favourite nail clients. She is wearing CND™ Liquid & Powder Enhancements decorated with SHELLAC™ and Lecenté™ Nail Art Foil pressed on to a design stamped on from the Yours Loves Sascha range of Stamping Plates.
- Apply one layer of SHELLAC™ Untitled Bronze and cure in the CND™ LED Lamp using the (2S) button.
- Apply one layer of SHELLAC™ Sparks Fly and cure in the CND™ LED Lamp using the (2S) button.
- Apply one layer of SHELLAC™ XPRESS5™ Top Coat, cure in the CND™ LED Lamp using the (3) button, then completely remove the top film with d.sperse (IPA). It’s important you leave behind no sticky layer at this stage.
- Brush SHELLAC™ Black Pool onto the stamping plate and use a scraper to spread the colour through the design. Scrape a few times in different directions to ensure the Black Pool is only in the grooves of the design and the rest of the surface is clean.
- Roll your stamper over the design to pick it up.
- Roll the stamper across the nail to transfer on the design.
- The design will look quite faint at this point, that’s fine, we don’t need Black Pool Colour, we need it’s sticky top film. Cure in the CND™ LED Lamp using the (2S) button.
- Press Lecenté Silver Stars foil onto the nail and it will only stick to the top film of the Black Pool that had just been cured.
- Finish with XPRESS5™ Top Coat and cure using the (3) button.
*THIS STEP BY STEP IS INTENDED FOR FULLY QUALIFIED NAIL PROFESSIONALS
*REMEMBER TO MASK OFF THE SKIN AROUND THE NAIL WHEN STAMPING WITH SHELLAC™ TO PREVENT OVEREXPOSURE.
