

This plate is the absolute BUSINESS! If I do say so myself! I have been having so much fun using the designs over the last few weeks and have created a step by step video tutorial on my YouTube Channel.
In this blog are the step by step details of the three looks from the video as well as a list of products used and where yo buy them.
This first look is gloriously simple, fast and perfect for clients with shorter natural nails. The every day Shellac client who fancies something a little different is going to love this!

Step-By-Step Guide
- After performing PEP to natural nails, apply and cure your Shellac Base Coat. Alternatively, if you’re decorating nail enhancements, prepare the surface and then apply and cure two layers of Shellac Rubble.
- After cleaning the plate and the :YOURS Halo Stamper with CND ScrubFresh, apply CND Creative Play Life’s A Cupcake and scrape over 1-3 times with the scraper-card.
- Pick up the pattern with your Halo Stamper by rolling gently over the plate in a circle.
- Apply design to the sticky top film of the cures Shellac Colour layer one element at a time. You should only need 3 pick ups for all ten nails!
- Remove any overhanging pieces of the design with a firm brush or a wooden stick.
- To finish, apply Shellac Original Top Coat and cure.
Step-By-Step Guide
- After performing PEP to natural nails, apply and cure your Shellac Base Coat. Alternatively, if you’re decorating nail enhancements, prepare the surface and then apply and cure two layers of Shellac Asphalt.
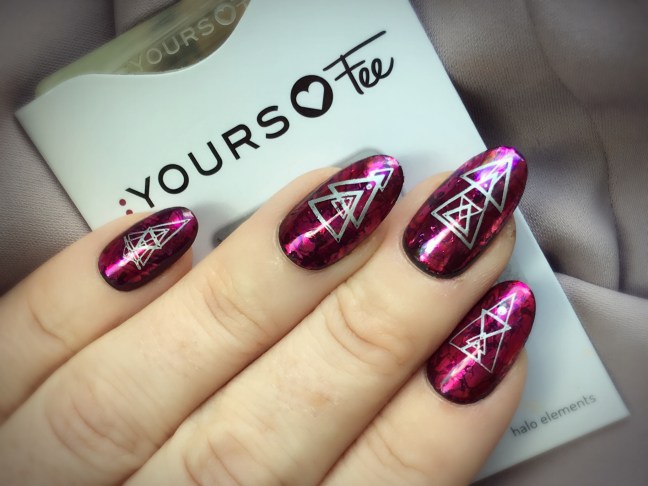
- Press Lecenté Oil Slick Foil onto the cured Asphalt (matt side down) to transfer the foil to the nail surface in a random pattern covering most of the nail.
- Follow with an ULTRA THIN layer of Shellac Decadence. The foil below will shine through giving an intense pink metallic look.
- After cleaning the plate and the :YOURS Halo Stamper with CND ScrubFresh, apply CND Creative Play Polish My Act and scrape over 1-3 times with the scraper-card.
- Pick up the pattern with your Halo Stamper by rolling gently over the plate in a circle.
- Apply design to the sticky top film of the cured Shellac Colour layer one element at a time. You should only need 3 pick ups for all ten nails!
- Remove any overhanging pieces of the design with a firm brush or a wooden stick.
- To finish, apply the appropriate Shellac Top Coat and cure.

Step-By-Step Guide
- After performing PEP to natural nails, apply and cure your Shellac Base Coat. Alternatively, if you’re decorating nail enhancements, prepare the surface and then apply and cure two layers of Shellac Studio White.
- After cleaning the plate and the :YOURS Halo Stamper with CND ScrubFresh, apply CND Creative Play Skinny Jeans and scrape over 1-3 times with the scraper-card.
- Pick up the pattern with your Halo Stamper by rolling gently over the plate in a circle.
- Apply design to the sticky top film of the cured Shellac Colour layer landing your stamper so the design hits dead centre.
- Repeat the last 3 steps this time using Creative Play Well Red, land the design a quarter turn from the previous stamp, filling the empty areas with detail and colour.
- Remove any overhanging pieces of the design with a firm brush or a wooden stick.
- To finish, apply the appropriate Shellac Top Coat and cure.
Where to Buy
To buy any of the products used in these three looks in the UK & Ireland visit http://www.sweetsquared.com
For a list of Lecenté distributors world-wide, visit here: http://lecente.com/distributors/
For a list of :YOURS distributors world-wide, visit here: http://www.yourscosmetics.com/local-distribution/
If you don’t see your country on the list you can buy direct from :YOURS who ship world-wide: https://www.yourscosmetics.com/webshop/
Check out http://www.cnd.com for a list of international distributors.
